Tutorials
Video tutorials can be found in our
 YouTube channel.
Additional cookbooks related to GigaMesh on the
Tools for Archaeology and Cuneiform Studies in the Modern Era – TACUME's gitlab page on
Open Educational Resources for 3D.
This is an application-based manual for the GigaMesh Software framework.
It shows basic processing steps typically and also very often used within our projects.
Many of the steps can be combined for more advanced tasks.
Theoretical concepts can be found in the publications section.
For earlier versions of the manual
click here.
Topics found in the manual:
- 00. Video Tutorials
- 01. First Steps
- 02. Labeling and Function Values
- 03. Mesh Cleaning
- 04. Profile Lines and Cross Sections
- 05. Unwrappings
- 06. Extrude Profile Lines
- 07. Distance Visualization
- 08. Distance Measurement between Points
- 09. Volume
- 10. Colorramps
- 11. MSII Filtering - Feature Vectors
- 12. Export Screenshots
- 13. Apply TPS RPM Transformation
12. Export Screenshots
Screenshots are additionally demonstrated within the sixth video tutorial on YoutTube, published having the DOI:10.11588/heidok.00026537 being available for download at heiDOK.
There are several ways to export images from GigaMesh.
Everything that is visible in the workspace will also be exported in the image,
e. g. the plane (uncheck View → Mesh Plane) or solo vertices (uncheck View → Vertices → Solo).
Adjust the lighting settings if needed (Settings → Lighting ff.).
Using Settings → Ortho Scale (Set DPI) allows to enter the DPI manually.
Save the desired object orientation with F6 before proceeding.
In order to export true scale screenshots, see if Settings → Orthographic View is enabled (default).
The exported images have their DPI-number included in their file names.
12.1. Single Screenshot
For a simple screenshot of the workspace, choose File → Export Screenshots → Screenshot (TIFF/PNG). When asked for tiled rendering, choose NO for a screenshot of the current view with screen resolution and background grid. When tiled rendering is used, the screenshot will cover the whole mesh in a resolution depending on the DPI settings and not include the background grid.
12.2. Multi-View Images
It is possible to export multiple views of an object via File → Export Screenshots → Screenshot Views. The settings for DPI and tiled rendering are the same as for single screenshots. For a classic orthogonal six-side view, check File → Export Image Stack → Camera on Longitudinal Orbit (Vertical Axis). For eight views (e. g. common for cuneiform tablets) check File → Export Image Stack → Camera on Altitudinal Orbit (Horizontal Axis).
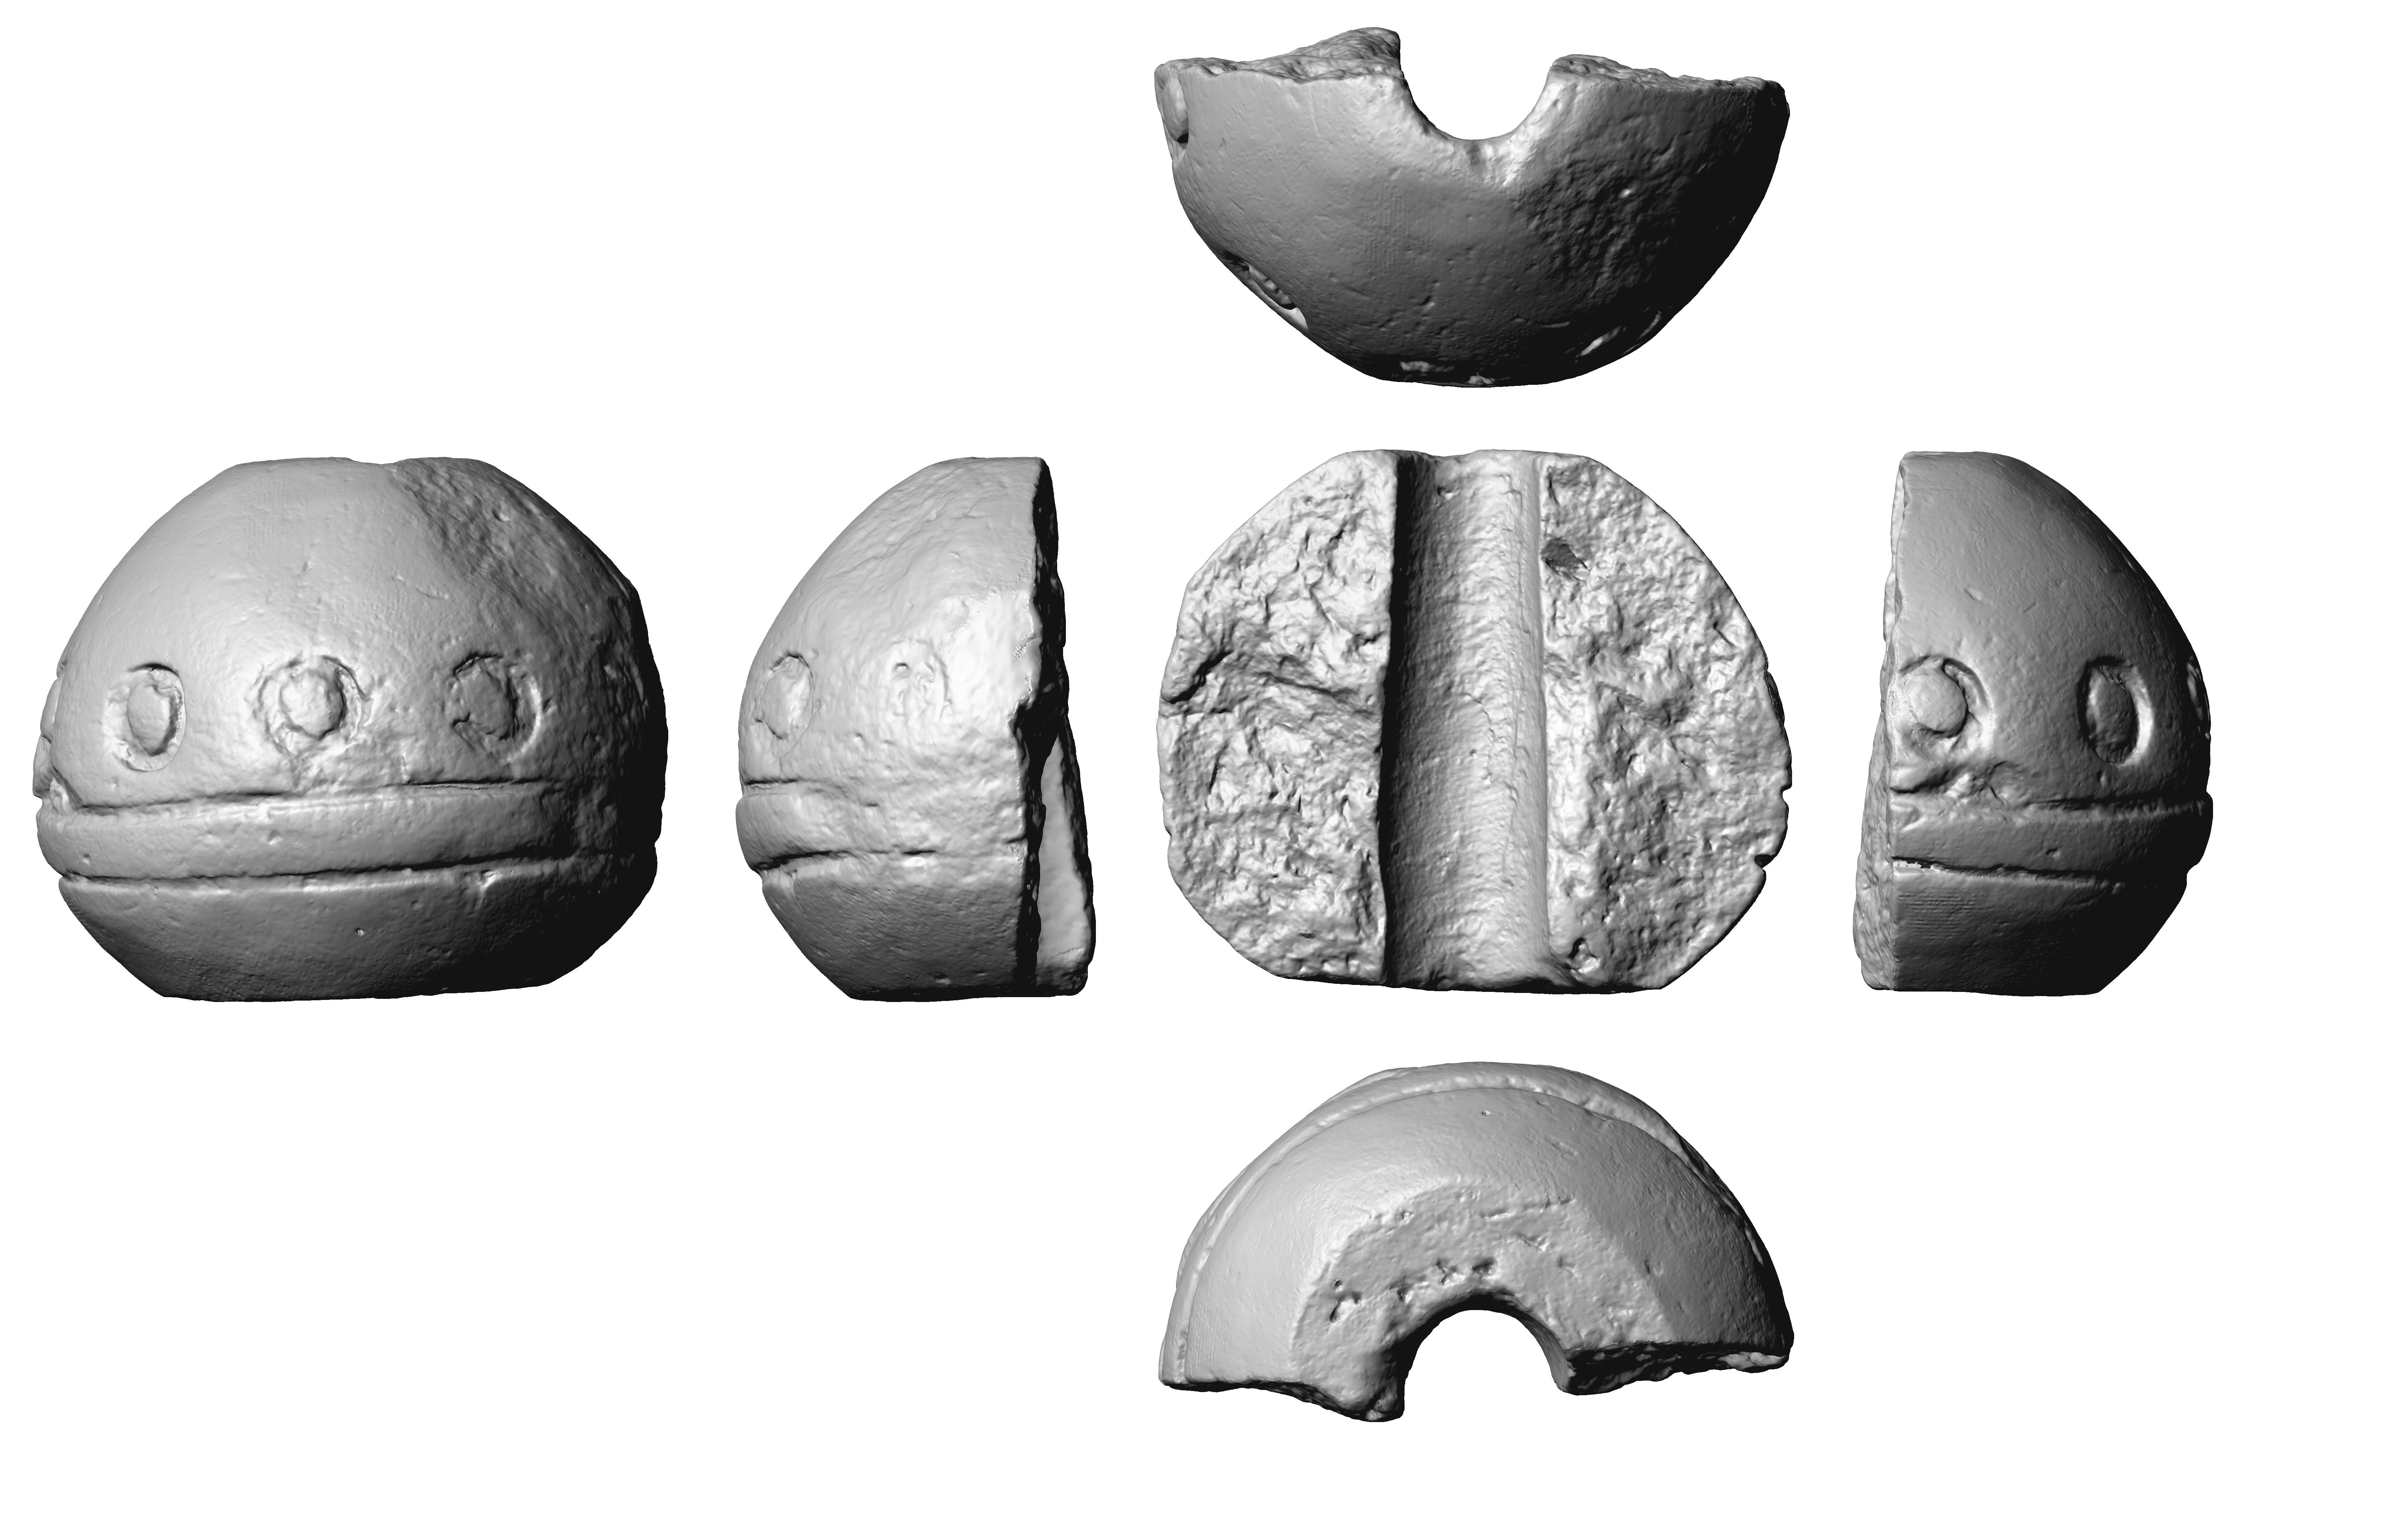
Figure 12.1: Screenshot 6-side-view
12.3. Images with embedded DPI - True-to-scale
Screenshots exported in Portable Network Graphics (PNG) format contain the proper printing resolution in DPI i.e. are true-to-scale, when the orthographic projection is enabled. The orthographic projection is enabled by default. The projection mode can be changed to perspective in the Settings menu.
A specific DPI value can be set using Settings → Ortho Scale (Set DPI),
which can be accessed using the Shift+F7 keyboard shortcut.
12.4. Ruler export
A ruler can be exported via File → Export Screenshots → Screenshot Ruler. Do not change the DPI between exporting the ruler and the associated screenshots.
12.5. Image Stack for Videos
To create an image stack that can be used for videos, the camera is moved around the object creating several hundred images. Specify the parameters for the camera orbit via File → Export Image Stack. To move the camera around the object horizontally, choose File → Export Image Stack → 360° Circular Orbit Horizontal Axis. To move the camera around the object vertically, choose File → Export Image Stack → 360° Circular Orbit Vertical Axis.